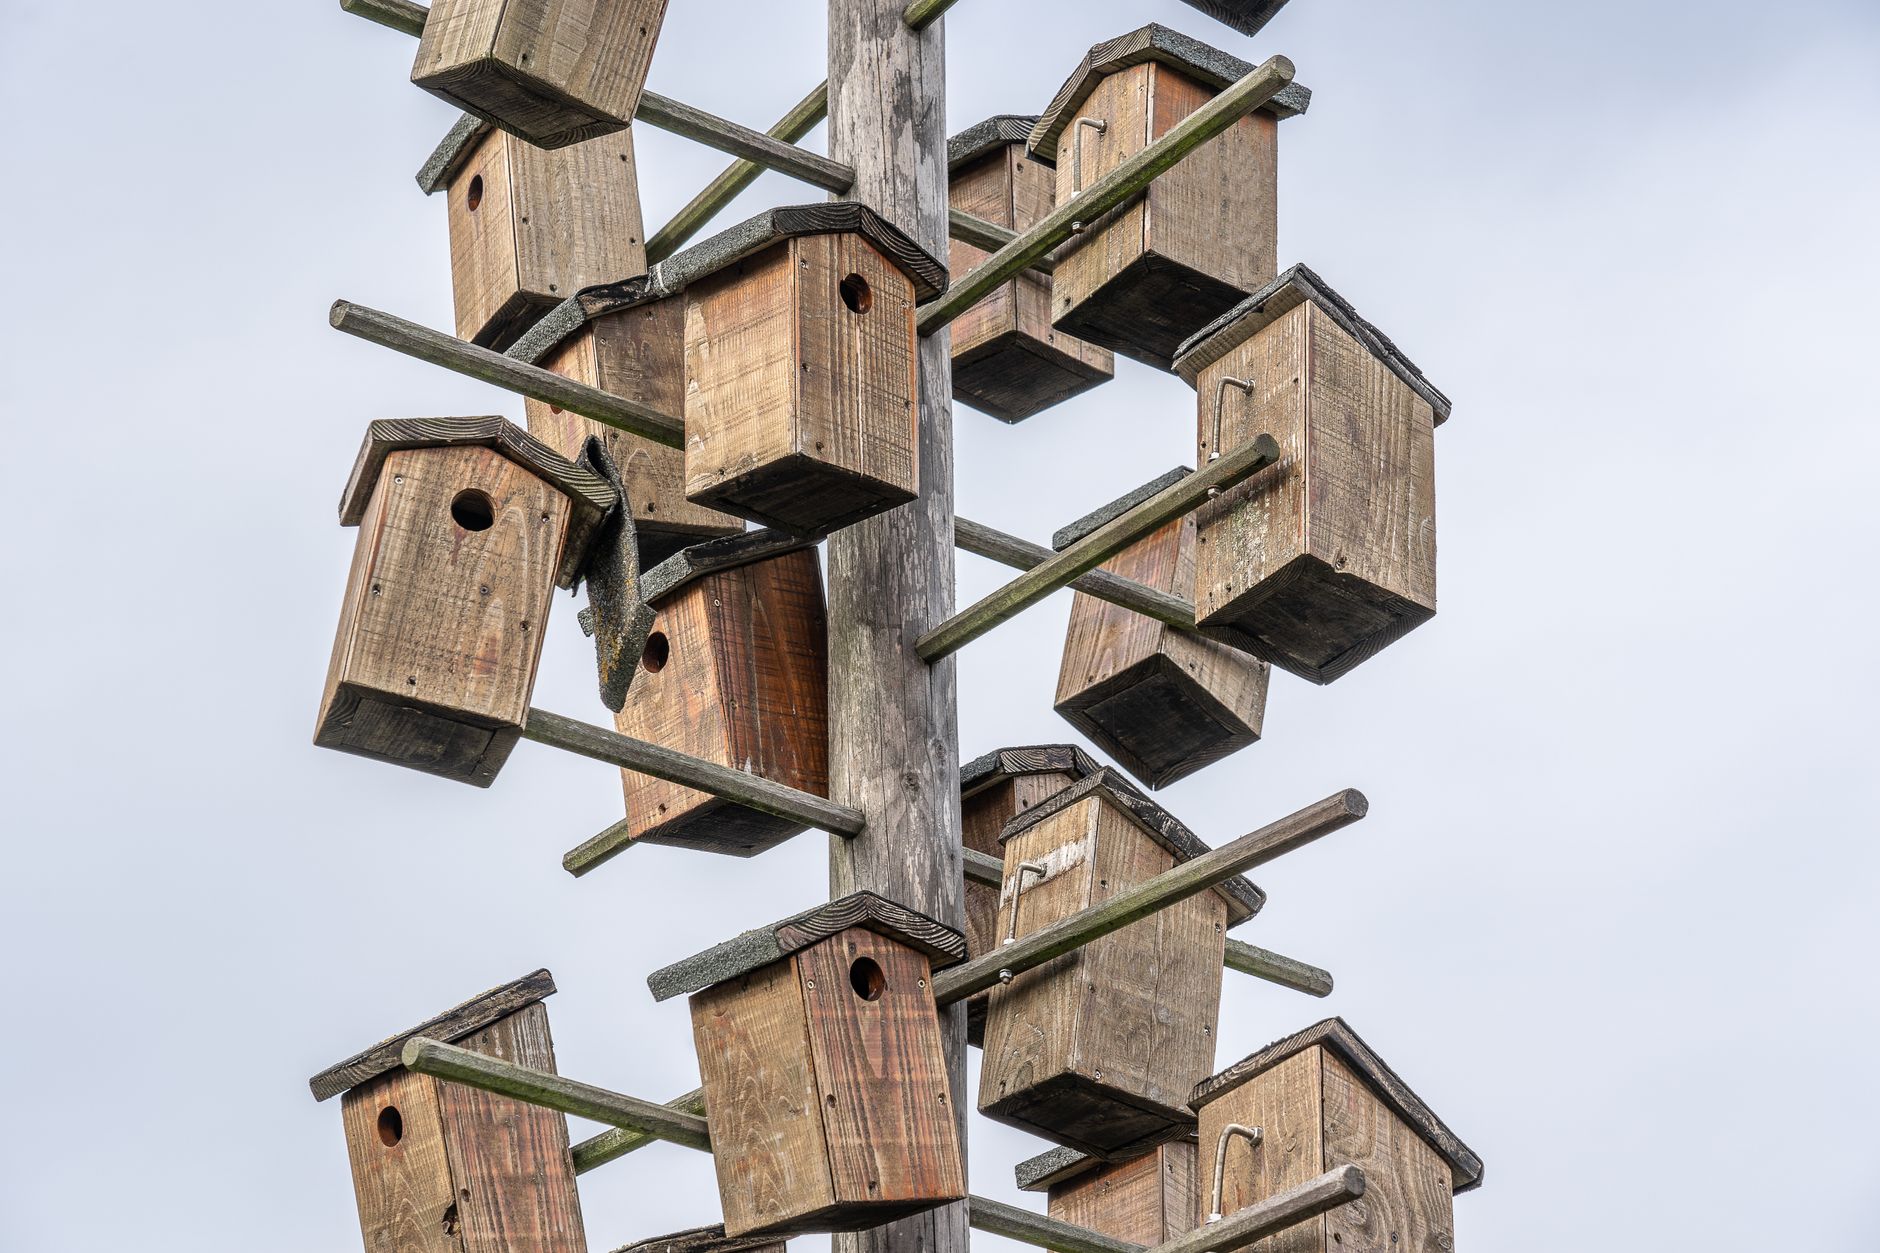
Are you tired of seeing those flimsy, mass-produced nesting boxes that barely last a season and offer minimal security for your precious parakeets? I know I was. For years, I struggled with flimsy particleboard boxes that warped, warped, and eventually disintegrated, often during the most critical nesting period. It was a frustrating and expensive cycle. But what if I told you that building a superior, long-lasting breeding box for your parakeets is not only achievable but can actually save you money and provide a healthier environment for your birds? Forget those overpriced, poorly designed options. We’re going to dive deep into constructing robust, bird-safe nesting enclosures that will serve your flock for years to come, using materials you can find at your local hardware store and techniques that even a beginner woodworker can master. We’re talking about ventilation that actually works, privacy that encourages breeding, and finishes that are absolutely safe for your feathered friends. Let’s build something better.
12 min read
In This Article
- Why DIY Breeding Boxes Trump Store-Bought
- Essential Materials and Tools for Construction
- Designing for Optimal Ventilation and Airflow
- Creating a Secure and Private Nesting Environment
- Safe Finishes and Interior Design Considerations
- Cage Dimensions and Bar Spacing for Parakeets
- Troubleshooting Common Breeding Box Issues
Key Takeaways
- Why DIY Breeding Boxes Trump Store-Bought
- Essential Materials and Tools for Construction
- Designing for Optimal Ventilation and Airflow
- Creating a Secure and Private Nesting Environment
Why DIY Breeding Boxes Trump Store-Bought
Let’s be honest, the market for parakeet breeding boxes is flooded with products that prioritize profit over quality. Many are made from cheap plywood or particleboard, which can off-gas harmful chemicals, especially when heated by body warmth or sunlight. The ventilation systems are often an afterthought, leading to stagnant air, high humidity, and potential respiratory issues for both the parents and their chicks. Furthermore, the interior dimensions are frequently too small, restricting movement and causing stress during incubation and chick-rearing. I’ve seen too many instances where chicks were overcrowded, leading to injury or even death. The lack of proper cleaning access is another major drawback; many boxes are sealed units, making it a nightmare to remove old nesting material or deal with any unexpected issues like mites or mold. This forces breeders to either discard the box after a single season or live with a potentially unsanitary environment.
When you go the DIY route, you gain complete control over every aspect of the nesting box. You can select premium, untreated lumber like pine or poplar, ensuring no harmful off-gassing. You can design the dimensions to be perfectly suited to your parakeet species, providing ample space for nesting and brooding. Most importantly, you can integrate superior ventilation and easy cleaning access from the get-go. Think about it: a box with strategically placed air holes that create a gentle airflow, preventing moisture buildup and keeping the air fresh. Or a hinged roof or a removable front panel that allows for quick inspections and thorough cleaning between clutches. This level of customization isn’t just about convenience; it’s about actively promoting the health, safety, and breeding success of your parakeets. My own breeding success rates saw a significant uptick once I switched to custom-built boxes with optimized ventilation and space.
My own breeding success rates saw a significant uptick once I switched to custom-built boxes with optimized ventilation and space.
Essential Materials and Tools for Construction
To build a truly superior parakeet breeding box, you’ll want to source high-quality, bird-safe materials. My go-to lumber is untreated pine or poplar, typically 3/4-inch thick. These woods are readily available at any home improvement store like Home Depot or Lowe’s, and they’re relatively inexpensive. Avoid pressure-treated lumber or any wood that has been chemically treated, as these chemicals can be toxic to birds. For fasteners, I prefer using stainless steel screws. They won’t rust, which is crucial in a potentially humid environment, and they provide a much stronger hold than nails. You’ll need a variety of lengths, from 1-inch to 2-inch screws. For the interior, especially the nesting area, a small piece of rough-cut wood or a textured surface can help the hen grip and dig her nest. A small block of untreated, rough-sawn cedar can be attached to the bottom interior for this purpose. You’ll also need a reliable wood glue – look for brands like Titebond II or Titebond III, which are water-resistant and non-toxic once fully cured.
When it comes to tools, you don’t need a professional workshop, but a few key items will make the job much easier and more precise. A good quality circular saw or a miter saw is essential for making straight, accurate cuts. For drilling pilot holes and driving screws, a cordless drill/driver is indispensable. You’ll also need a drill bit set, including a spade bit or hole saw for creating ventilation holes (typically 1/2-inch to 3/4-inch diameter). A tape measure, a pencil, and a speed square are vital for accurate measurements and marking cuts. Safety gear is non-negotiable: safety glasses to protect your eyes from sawdust and a dust mask to prevent inhalation of wood particles. If you plan on making multiple boxes, a jigsaw can be handy for cutting out entrance holes, especially if you want to create a specific shape, though a simple circular hole is perfectly functional. I always recommend having a good sanding block or orbital sander to smooth any rough edges, particularly around the entrance hole, to prevent injury to your birds.
Safety gear is non-negotiable: safety glasses to protect your eyes from sawdust and a dust mask to prevent inhalation of wood particles.
Designing for Optimal Ventilation and Airflow
Ventilation is arguably the most critical, yet often overlooked, aspect of a parakeet breeding box. Stagnant air within a nesting box can lead to a rapid increase in humidity, creating a breeding ground for bacteria and mold, which can be devastating for fragile chicks. It also leads to carbon dioxide buildup, which is harmful to respiratory health. My standard practice is to incorporate at least four to six 1/2-inch ventilation holes. I typically place two holes near the top on the back panel, just under the roofline, and two more on the front panel, slightly below the entrance hole. This creates a cross-breeze effect. I also like to add a couple of smaller 1/4-inch holes on the side panels, near the bottom, to allow for consistent air exchange. The key is to create subtle airflow, not a draft that could chill the birds, especially the young chicks.
The placement and size of these holes are crucial. Too large, and you risk drafts. Too small or too few, and you won’t get adequate air exchange. I’ve experimented with different configurations over the years, and I’ve found that a combination of holes on opposing sides, with some higher and some lower, works best. For example, on a standard 8x8x10 inch box, I’ll put two 1/2-inch holes on the upper rear, two 1/2-inch holes on the upper front (below the entrance), and then two 1/4-inch holes on each side panel, about an inch from the bottom. This ensures that no matter the external wind conditions, there’s always a gentle movement of fresh air in and out. I also ensure the roof has a slight overhang (about 1-2 inches) and isn’t perfectly sealed to the walls, allowing a tiny bit of escape for moist air. This subtle gap, combined with the drilled holes, creates a microclimate that is healthy and safe for breeding pairs.
This subtle gap, combined with the drilled holes, creates a microclimate that is healthy and safe for breeding pairs.
Creating a Secure and Private Nesting Environment
Parakeets, like most birds, are naturally cautious when it comes to nesting. They need to feel secure and protected from perceived threats, which is why privacy is paramount. A breeding box should ideally be placed in a quieter, less trafficked area of the aviary or room. The box itself should offer a sense of enclosure. This means avoiding designs with large openings or excessive visibility into the nesting chamber. The entrance hole is the primary point of entry and exit, and its size is important. For standard parakeets (Budgerigars), an entrance hole of 1 1/2 inches in diameter is typically sufficient. Too large, and it can invite predators or allow too much light and disturbance. Too small, and the hen may struggle to enter or exit, or it could impede the growth of the chicks’ feathers around the entrance.
To enhance privacy further, I often incorporate a “landing perch” or a small ledge just below the entrance hole, but this should be on the *outside* of the box only. Inside, the box should be smooth to prevent the hen from perching and potentially damaging eggs or chicks. Some breeders also add a small internal “shelf” or “lip” just inside the entrance hole, which helps to prevent chicks from falling out prematurely while still allowing them to be fed. Another effective method for increasing privacy is to place a simple screen or a partial divider in front of the box, at a distance of about 6-12 inches. This creates a buffer zone, making the birds feel less exposed. When I first started breeding, I noticed my pairs were much more settled and laid more consistently once I added these simple privacy measures. It’s about mimicking the natural safety they’d find in a dense tree hollow or a secluded cavity.
It’s about mimicking the natural safety they’d find in a dense tree hollow or a secluded cavity.
Safe Finishes and Interior Design Considerations
When it comes to finishing your DIY breeding box, safety is non-negotiable. The interior of the box should *never* be painted or varnished. These finishes can off-gas toxic fumes, especially when heated, and birds have highly sensitive respiratory systems. Birds also have a tendency to chew on surfaces, and ingesting paint or varnish can lead to serious health problems. If you want to protect the exterior of the box from moisture and wear, you must use bird-safe, non-toxic paints. The gold standard here is to look for paints that are certified as “non-toxic” and ideally “food-grade” or “FDA-approved for incidental contact.” Brands like Behr Premium Plus Interior Paint or Sherwin-Williams ProMar 200 are often cited by avian veterinarians and experienced breeders as safe options *for exterior use only*, provided they are fully cured. This curing process can take several weeks, during which the paint smell should completely dissipate. I typically let my boxes air out for at least 30 days after painting before introducing any birds.
For the interior, the goal is to provide a safe, comfortable, and functional space. As mentioned, a rough surface inside the bottom of the box is beneficial. I often use a small piece of rough-cut cedar or even score the inside bottom with a saw blade to give the hen something to grip for digging. Some breeders add a layer of nesting material, such as clean wood shavings (pine or aspen, never cedar due to its aromatic oils) or shredded paper, at the bottom to encourage nest building. However, many parakeets will create their own nest cavity regardless of added material. The key is to keep the interior simple and easy to clean. Avoid any small crevices or hard-to-reach areas where mites or parasites could hide. A removable bottom or a hinged top makes cleaning significantly easier, allowing you to scrape out old nesting material and disinfect the box thoroughly between breeding cycles. This proactive approach to hygiene is vital for preventing the spread of disease.
Cage Dimensions and Bar Spacing for Parakeets
The dimensions of your breeding box are crucial for the comfort and success of your parakeet pair. While specific needs can vary slightly by individual pair, a good general guideline for a standard parakeet (Budgerigar) breeding box is an internal floor space of approximately 8 inches by 8 inches, with a height of at least 8 to 10 inches. This provides enough room for the hen to lay her eggs comfortably, for the parents to move around without disturbing the eggs or chicks, and for the chicks to grow without being overcrowded. I’ve found that going slightly larger, perhaps 10 inches deep, can be beneficial, especially for larger parakeet species or if you anticipate larger clutches. The entrance hole should be positioned about 4-6 inches from the bottom of the box to prevent chicks from easily falling out.
When it comes to the main breeding *cage* that houses the nesting box, bar spacing is a critical safety consideration. For parakeets, the bar spacing should be no more than 1/2 inch (0.5 inches or approximately 1.27 cm). This prevents the birds from getting their heads stuck between the bars, which can lead to serious injury or death. The cage itself should be spacious enough to allow for flight and exercise, even with a nesting box inside. A minimum cage size for a breeding pair of parakeets would be around 30 inches long, 18 inches wide, and 18 inches high. However, larger is always better. My preference is for cages that are at least 36 inches long, as this allows for more horizontal flight space, which is natural for parakeets. Ensure the cage is made from safe materials, such as powder-coated steel or stainless steel, and avoid cages with zinc or lead components, as these are toxic.
Troubleshooting Common Breeding Box Issues
Even with the best intentions and construction, you might encounter a few common issues with DIY breeding boxes. One frequent problem is the hen refusing to use the box. This can stem from several factors: the box might be placed in too busy an area, it might not feel secure enough, or the entrance hole could be the wrong size. If your hen is hesitant, try moving the box to a quieter location, ensuring it’s well-hidden, or slightly adjusting the entrance hole size. Another issue is excessive chewing on the box itself. While some chewing is normal, excessive destruction can indicate boredom, nutritional deficiencies, or stress. Ensure your birds have plenty of chew toys and a balanced diet. If the chewing is focused around the entrance, you might consider adding a metal or plastic guard to protect the wood, though ensure these are also bird-safe and don’t create sharp edges.
Humidity and mold inside the box are serious concerns. If you notice condensation or mold, your ventilation is insufficient. Immediately remove the birds, clean the box thoroughly with a bird-safe disinfectant (like a diluted white vinegar solution, rinsed thoroughly), and increase the size or number of ventilation holes. I’ve had to enlarge holes from 1/2 inch to 3/4 inch on humid days or in smaller rooms. Ensure the cage isn’t placed near a constant source of moisture, like a humidifier or a frequently misted plant. Finally, some hens can be overly aggressive towards their mates or chicks. While this is more of a behavioral issue, the box design can play a small role. Ensure there’s enough space for the male to retreat if needed and that the box isn’t so cramped that it exacerbates territorial disputes. If aggression is severe, you may need to separate the birds temporarily and consult with an avian veterinarian or experienced breeder.
Building your own parakeet breeding boxes is a rewarding project that offers significant benefits for your birds’ health and your breeding success. By focusing on safe materials, proper ventilation, and a secure environment, you can create nesting solutions that far surpass anything you’ll find on the market. Remember to always prioritize bird safety by using untreated wood and non-toxic finishes for the exterior only. Don’t be afraid to experiment with ventilation hole placement and size to find what works best for your specific climate and aviary setup. If you’re looking to upgrade your breeding setup, consider building at least one or two custom boxes to see the difference they make. You might be surprised at how much more settled and productive your breeding pairs become.
Sources & further reading
- Do it yourself (en.wikipedia.org)
Frequently Asked Questions
What type of wood is best for parakeet breeding boxes?
The best wood for parakeet breeding boxes is untreated, kiln-dried pine or poplar. These woods are readily available, relatively inexpensive, and free from the harmful chemicals found in pressure-treated lumber or woods treated with pesticides. Avoid cedar or redwood, as their aromatic oils can be irritating or toxic to birds. Always ensure the wood is smooth on the inside, except for the bottom where a slightly rough texture can help the hen dig her nest. My personal preference is for 3/4-inch thick pine because it offers good insulation and is sturdy enough for screws.
How many ventilation holes are needed, and what size should they be?
For a standard parakeet breeding box (approximately 8x8x10 inches internal dimensions), I recommend a minimum of four to six 1/2-inch diameter ventilation holes. Place two near the top on the front and back panels, and two more on the side panels, slightly lower down. This creates a gentle cross-breeze without causing drafts. If you live in a very humid climate or notice condensation, you may need to add more holes or slightly increase the diameter to 3/4 inch. Proper ventilation is crucial for preventing respiratory issues and mold growth.
Can I paint the inside of the breeding box?
Absolutely not. The inside of any bird enclosure, especially a nesting box, should *never* be painted, stained, or varnished. Birds have sensitive respiratory systems and can ingest toxic fumes or particles. The interior should remain bare, natural wood. If you wish to paint the exterior for durability and aesthetics, only use non-toxic, water-based paints that are certified safe for children or, ideally, FDA-approved for incidental contact. Ensure the paint is fully cured for at least 30 days in a well-ventilated area before introducing birds to the box.
How do I make the breeding box easy to clean?
Ease of cleaning is a major advantage of DIY boxes. The simplest method is to design the box with a hinged roof or a removable front panel. A hinged roof, secured with a simple hook-and-eye clasp, allows for quick access to inspect eggs and chicks and to remove old nesting material. A removable front panel, held in place with a couple of screws, also works well. My favorite design incorporates a hinged roof and a slightly extended bottom that can slide out, making deep cleaning much more manageable. Aim for smooth interior surfaces with minimal crevices where debris can accumulate.
Small changes, real momentum
Get practical guides and templates you’ll actually use — a few thoughtful emails a month.
For the Love of Your Pet
Care guides, breed insights, and gentle advice for happier pets.